Don’t tell, show. It’s straightforward advice, and screen recording software makes it easier to understand.
One of the simplest ways to make a video is to record it on the screen. With screen recording videos, there aren’t as many issues because most of the events are happening in real time and can be controlled by the person who is filming. However, this does not imply that screen recording is an easy task. When we film screen capture videos, we tend to overlook a lot of the fundamentals, which results in bland and tedious recordings. This could easily turn off the audience. In this guide, we’ll show you 10 Secrets to creating high-quality screen recording videos with some tips and tricks.
SUBSCRIBE TO INCOME PATROL
Get updates on the latest posts and more from Income Patrol straight to your inbox.
CREATE AN OUTLINE
Screen recordings are made for a variety of reasons. It might be to record a meeting or the product flow for a tutorial video, among other things. It is critical to plan the tempo of the recording and have a basic screenplay or outline ready.
With a clear notion of what you want to record and a preliminary screenplay, you’ll be able to shoot videos exactly and without much misunderstanding. The recording will frequently be too long if there is no flow or script. There will also be a lot of needless portions that will require a lot of work to edit.
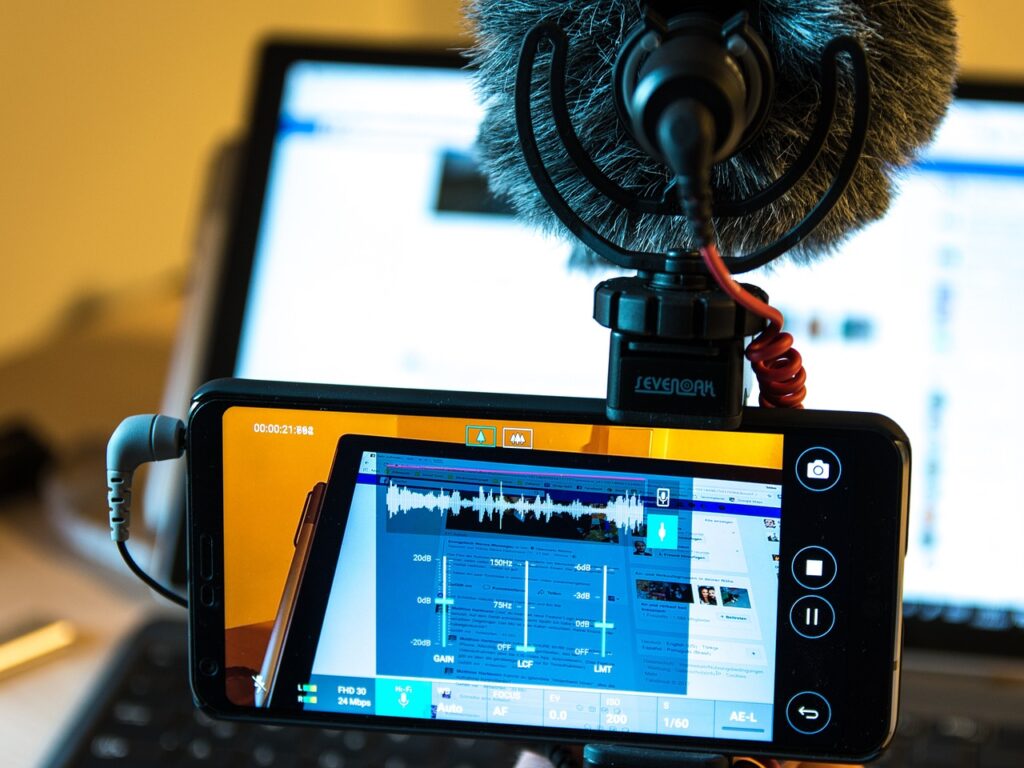
RECORD IN A QUIET ENVIRONMENT
Poor sound quality is one of the most typical issues you may encounter when first starting out screen-recording videos. The microphone being too far away from the source of sound you are capturing, or the setting being too noisy, is frequently the source of the problem. Sometimes the solutions you try to implement make the situation worse. For example, if you plug in an external microphone and the connection is poor, you may receive no or sporadic audio recording. No sound is unquestionably more difficult to overcome than bad audio quality.
You should always strive to record audio in a quiet environment. This is due to the fact that all sound recording equipment performs best when noise is kept to a minimum. As a result, when musicians make records, they normally go to a recording studio with a sound-insulated chamber where they can perform.
Getting the microphone close to the sound you’re capturing will help your videos sound better in any context.
NOTIFY VIEWERS OF THE TOPICS THAT WILL BE COVERED IN THE VIDEO
Inform the audience in advance of what it is that they can expect to see on the screen. This will save them from having to waste time expecting something that won’t happen or skipping ahead because they are already familiar with the process. Also, point folks in the direction of your other films, so that they don’t have to waste time searching YouTube, Google, and the like to locate them!
DON’T OVERUSE SCREEN ANNOTATIONS, OR CAMERA OVERLAY
Users can make the screen recording more entertaining and interactive by using screen annotation, mouse emphasis, and a moveable webcam overlay. However, over use of the tools will result in a terrible viewing experience.
Hovering the mouse over the screen and clicking all the time makes it harder for the viewer to interpret what is being displayed.
Likewise, screen drawing or annotations can be a terrific method to create fascinating movies, but they must be used with caution.
When recording with a webcam overlay, the position of the webcam overlay is critical. The webcam overlay should be positioned so that the user can see both the screen and the person behind the webcam. The constant hovering of the webcam overlay after gain produces an unpleasant watching experience and should be avoided at all costs.
USE HIGH-QUALITY MICROPHONE AND WEBCAM
It is essential to have a high-quality microphone and webcam in order to successfully record videos, as the performance of your screen recording is heavily influenced by the microphone and webcam you use.
It is recommended that users refrain from making use of the microphones located on the inside of computers. In the same vein, there is no compelling need to make a substantial financial investment in a professional microphone because the task at hand might be accomplished with a relatively simple microphone that is bundled together with an earphone.
In a similar vein, people who use Macs do not need to be concerned about the webcam because the one that comes built-in provides an experience that cannot be matched by any other webcam recording. If you use Windows, you might want to think about upgrading your webcam to one that is good enough to create nice videos if you want to use Windows.
Make sure that the software you are using to record has the capability to connect external microphones and a camera.
DECIDE ON SCREEN RESOLUTION AND THE SIZE OF RECORDING
Recording the screen by itself is one option for screen recording; another option is to record both the screen and a webcam at the same time. To begin, you’ll need to make a decision regarding the kind of screen recording you intend to carry out. The next thing to do is to carefully record the information that you wish to record.
It is essential to communicate only the information that is pertinent and required. You will need to make a decision as to whether you want to record the entire screen, just a tab, or a specific region of the screen.
Also, make sure that you quickly go through all of the other screen recording settings, such as determining whether or not you require the system audio, so that the recordings come out exactly the way you want them to.
SELECT THE SCREEN RECORDING SOFTWARE AND PERFORM A TEST RUN
Choose the screen recording software that will be used to make the screen recording video. The finest screen recording software should include capabilities that allow you to record the screen, camera, or both at the same time with audio, as well as screen annotation, noise cancellation, and editor choices.
After selecting on and installing screen recording software, it’s critical to quickly go through the settings and shoot a dummy movie to familiarize yourself with the software and ensure that everything is operating properly.
You’ll be able to confidently converse while screen recording and read a script while staring into the camera if you film a mock video.
PUT IN A SECOND SCREEN.
If you can, attempt to set up a second monitor so that you can show your viewers exactly what you are doing on your primary monitor without having to constantly move between the two. This will save you time and make it easier for you to interact with them. The one and only problem with this strategy is that some people may mistakenly believe that you are actually staring out of those windows rather than merely employing them as props. And if they do see that, it’s possible that they will believe that you are unable to complete the task that you are now working on.
SLOW DOWN YOUR SPEECH
There will always be people who are unable to control their impatience and demand immediate results for their efforts. Because people will become impatient or bored, many of them won’t watch your videos all the way through to the end. Therefore, it is important to communicate in a slow and clear manner so that others who are interested in gaining knowledge from you can do so without excessively interrupting you or having to go back because they missed something you said previously. It is fine if it takes a little bit longer than normal; your viewers will enjoy it and say thank you in the future!
IF NEEDED, PAUSE FOR A MOMENT
It is possible to make a mistake when screen recording something complicated that calls for a significant amount of preparation in advance. If you keep going, you can end yourself having to re record everything. To get around this issue, simply pause after completing the majority of the activity at hand to check for and rectify any mistakes before going on to more challenging activities. After that, once everything has been set out exactly and is ready to go, begin filming without pausing anymore! This makes it much simpler for live viewers to follow along, since they won’t have to waste their time watching parts of the video that they have no interest in seeing.
PROVIDE MORE RESOURCES TO THE VIEWERS
Don’t forget to add any resources that were addressed in the recordings! These could be links to download software, additional reading material, or anything else that you think would be beneficial to have included! At the very least, you should try to incorporate a link to your blog within your video so that visitors can keep up with your upcoming uploads. That brings us to the end! Once you grow used to completing these things automatically throughout each recording session, it will only take a few minutes for you to complete most of these suggestions, despite the fact that this may appear to be a lengthy list. There is absolutely no reason for concern, even if you occasionally skip one or two phases in the process. Just keep in mind what was left out, and make sure to incorporate it in the next video. But you should be careful not to exclude anything intentionally.
MAKE SURE THAT THE RECORDING IS BRIEF AND TO THE POINT
If you are required to demonstrate a particular procedure more than once, make an effort to avoid repeating the same information over and over again, just like a tattered record player (or whatever it is kids listen to these days). Explain only what is absolutely necessary to understand. In that case, further information can cause some people to get perplexed. They have the option of posting a question or remark on your video, to which you will be able to respond once the screencast has concluded.
IF YOU MESS UP OR MAKE A MISTAKE, THERE’S NO NEED TO FREAK OUT
It is something that can happen to any one of us at any time. People are human and occasionally make mistakes, which they fear will entirely destroy the film. It’s possible that they don’t talk for ten minutes straight, and then all of a sudden one of them makes some idiotic remark about penguins. Fortunately, the vast majority of viewers won’t even notice these minor mistakes, but if they do, they may consider you an idiot and quit watching your movies altogether. Don’t freak out and just ignore what’s going on!
TAKE OUT THE UNWANTED RECORDING
Sometimes, it happens by accident, but when it does, the screen recording is not saved. This results in blank space being displayed on the screen, giving the impression that nothing happened for several minutes. The most upsetting element is that not only do live viewers have no idea what is going on, but neither do their friends or family members who are also watching. As a result, people might rapidly look elsewhere for stuff to learn from. After gaining this unwelcome piece of knowledge, you should eliminate any undesirable recorded segment by chopping it out using tools like annotations, for example. By doing it this way, the folks watching won’t have to see my hands moving aimlessly over the computer while I look entirely uninterested.
PRACTICE YOUR PERFORMANCE PRIOR TO RECORDING
To ensure that your screencast turns out exactly as it should, you should position yourself in front of the camera and carry out all of the necessary steps. You can, for instance, educate yourself on how to move around in your own website. You should try to record while wearing the same clothes you intend to wear when you make the recording, sitting in the same area, and using the same microphone and other recording equipment.
HIDE BACKGROUND DATA
If you are demonstrating how to accomplish anything on your computer screen, be sure that the person you are demonstrating to can see what’s on the screen, and that there are no distracting objects behind you. Even more crucial is ensuring that there is no information that is easily accessible that could potentially reveal some of your secrets. For instance, burying pricing lists on the websites of competitors, etc.
FINISH WITH AN INTERESTING CONCLUDING STATEMENT
Record a brief video recap of all that occurred throughout the recording rather than leaving room at the conclusion where you might have been doing nothing of significance. People who watched only a portion of your film or who want to rapidly review what took place won’t have to watch the full thing from beginning to end just so they may benefit from this feature, despite the fact that it will result in a greater file size. If you so choose, you can accomplish this with annotations.
CONCLUSION
Businesses can benefit from screen recording because it lets users upload what they see on their devices.
With the help of screen recording, you can also add unique media to emails or online posts that you send to clients. You can make sure that your company’s learning materials and other important paperwork have real-life pictures instead of complicated drawings. In the business world of today, a well-taken picture can go a long way.
So from next time when you plan to do a screencast, definitely go through the above points shared. They seem very simple (and they are), but can have a huge impact on your overall screen recording workflow.
LIMITED-TIME OFFER!
With LIFETIME ACCESS membership ($67) you have access to ALL exclusive materials (current and upcoming) for lifetime. We create new courses, ebooks, webinars and downloads on a regular basis. This offer expires soon and will be replaced with monthly-paid subscription, so hurry up! Get access HERE!